










This walks through one wall from an empty canvas to a piece count and a Project Blueprint. The example is a 2.40 m × 2.50 m bathroom wall with a door, tiled in 600 × 300 mm ceramic.
Open the studio
Open Tile Layout Studio at /planners/tiling. If you are not signed in, choose Try demo. You can build the whole layout as a guest. An orange Demo mode bar across the top says: "This is a demo project with limited functionality. Create a free account to see the estimate, save, and export a blueprint." The Estimate numbers stay blurred until you do. Your draft is kept in this browser.
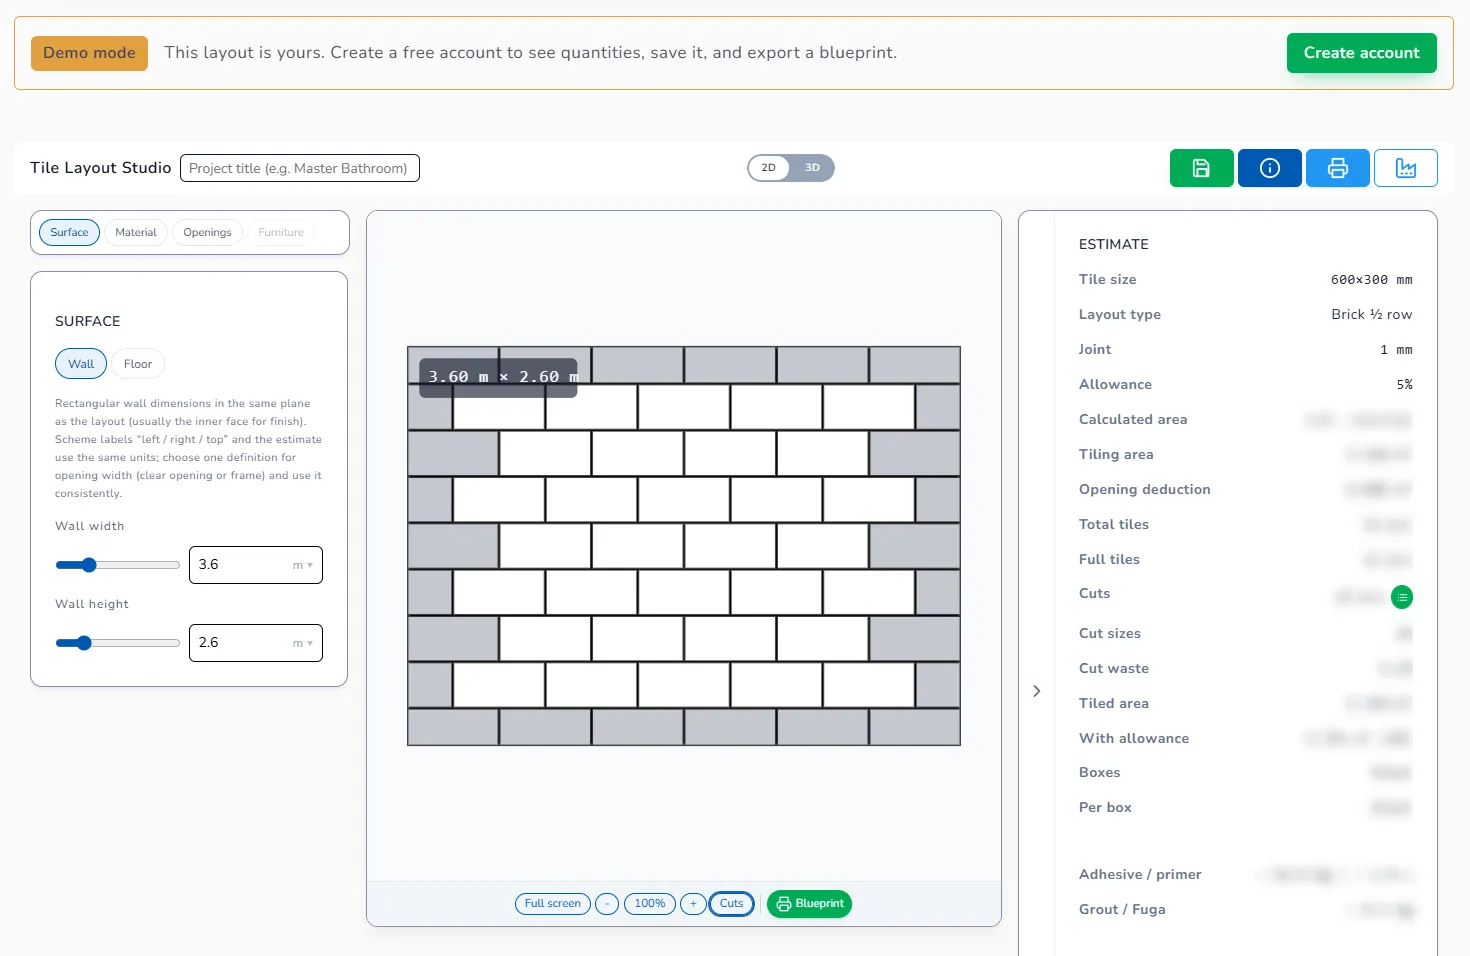
The left side has three tabs: Surface, Material, Openings (a fourth, Furniture, is greyed out unless 3D room mode is on). The canvas is in the middle. The Estimate panel is on the right. On a phone the same tabs become numbered steps ending in Estimate.
The header has the Project title field (placeholder: "Project title (e.g. Master Bathroom)"), a 2D / 3D switch, and four icons: save, help, print (that one downloads the Project Blueprint), and Factory MBOM export.

1. Enter the wall
On the Surface tab, keep Wall selected.
- Wall width: 2.40
- Wall height: 2.50
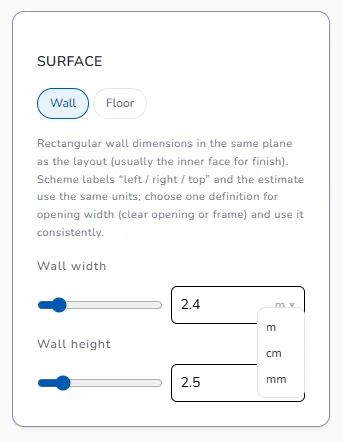
Each field has a slider on its left and a unit dropdown on its right (m, cm, mm). Type the number; the slider follows. Measure the face you will actually tile. If the wall is out of square, use the larger measurement and tell the tiler.
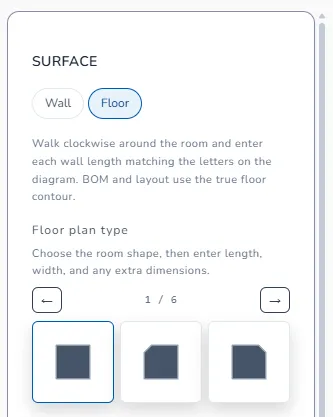
For a floor, choose Floor instead. You pick a Floor plan type from a paged set of room shapes, then enter each wall length in turn, walking clockwise around the room; the letters on the plan match the fields. The size you type is the size you order from — see Enter the wall or the floor you will tile.
2. Set the tile
On the Material tab:
- Type: Ceramic tile
- Tile length: 600, Tile width: 300 (millimetres)
- Joint (grout), mm: 2
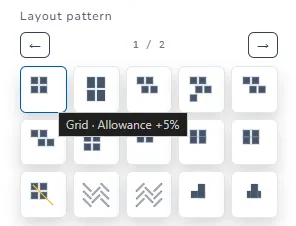
- Layout pattern: Grid
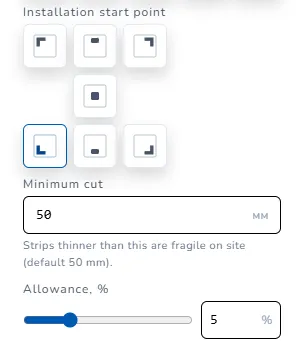
- Installation start point: Bottom left
- Minimum cut: leave at 50
- Allowance, %: leave at 5
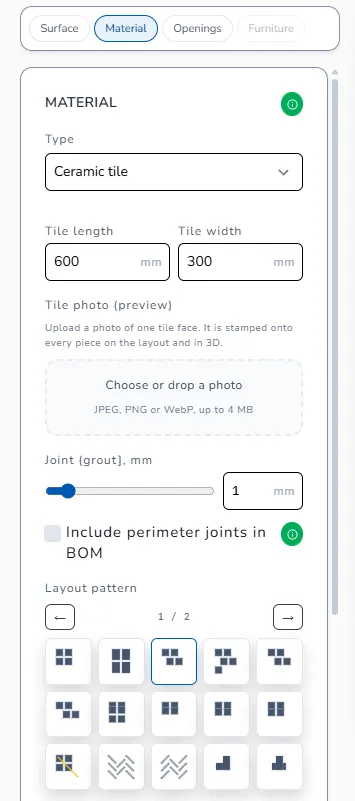
The pattern picker is two pages of thumbnails; click one to apply it. Hovering shows the name and the allowance the studio proposes for it, for example "Grid · Allowance +5%".
The Installation start point is seven buttons showing where the first full tile goes. The yellow marker on the canvas shows that origin. Below it sit Minimum cut and Allowance, %.
If you know the carton, enter Tiles per box and Box price further down the Material tab. Boxes and Tile total in the Estimate stay blank until you do.
3. Add the door
On the Openings tab, click + Door. A draft appears:
- Width: 0.80
- Height: 2.05
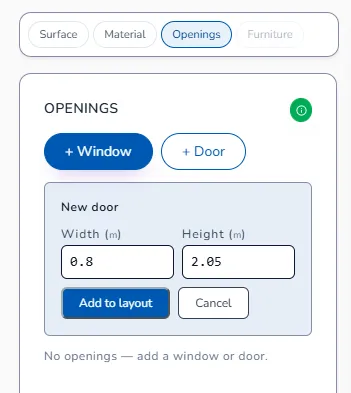
Click Add to layout. The door appears on the canvas and as "Door 1" in the openings list, with Width, Height, X left and Y top fields plus clone and delete icons. Set X left to 0.20 to put the door 200 mm from the left edge, or drag it on the canvas. The canvas labels the distances to the left edge, right edge and top for you. Arrow keys nudge the selected opening; hold Shift for a bigger step.
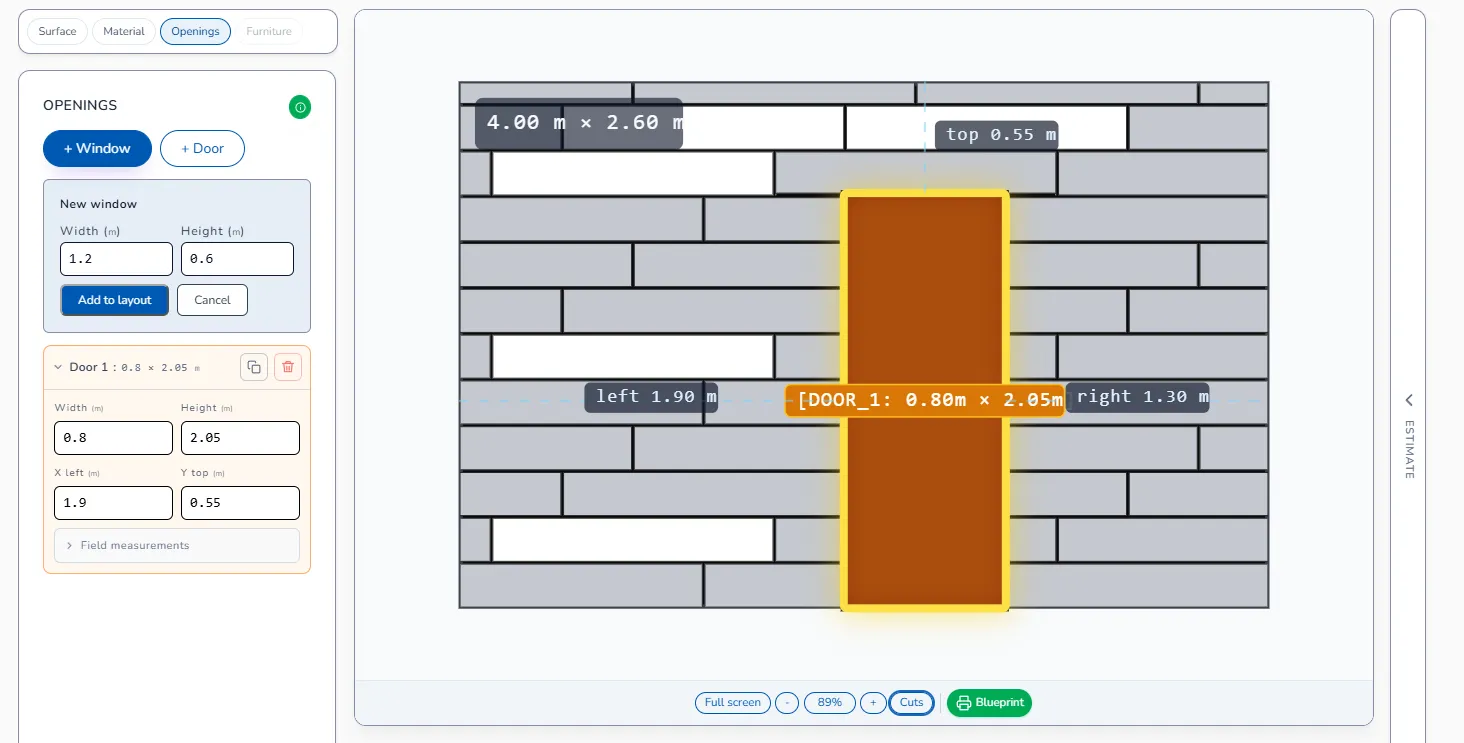
Openings cannot overlap. Doors and windows are the only opening types on a wall; floors use + Hatch and + Garage pit. The collapsed Field measurements section lets you enter the left and right distances you measured on site and apply them back to the wall width and X left. More in Add doors, windows and hatches.
4. Check the canvas
The canvas now shows every full tile and every cut, with a size chip in the corner. Scroll to zoom. The toolbar under the canvas has Full screen (it reads Normal view while you are in full screen), zoom − / % / +, Cuts (opens the Cut list) and the green Blueprint button.
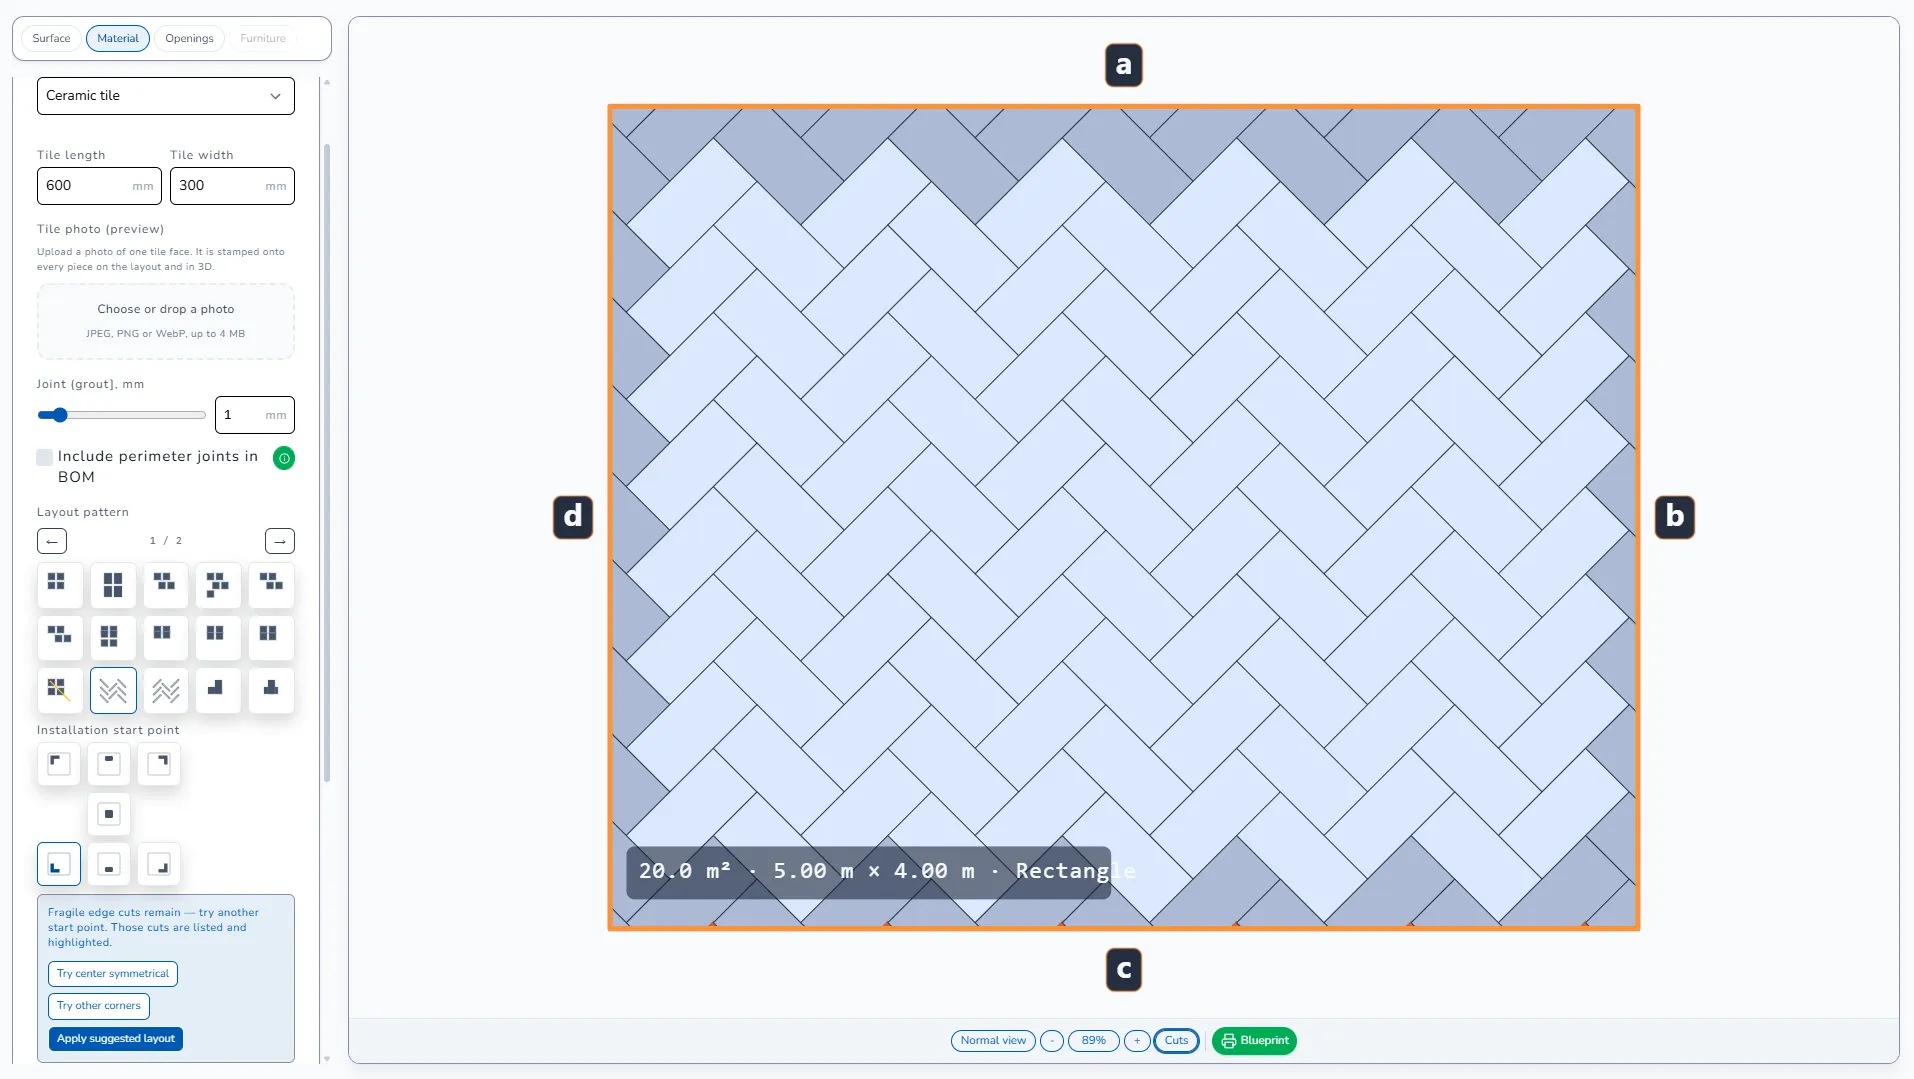
If a strip along an edge is thinner than your Minimum cut, the studio either moves the grid and shows Slivers eliminated, or shows a warning with three buttons: Try center symmetrical, Try other corners, Apply suggested layout. Read Thin cuts and Sliver Guard before you order.
5. Read the Estimate
The right panel lists:
- Tiling area and Opening deduction: the wall, and what the door takes off
- Tiled area: wall minus the door
- With allowance: tiled area plus your Allowance %. Adhesive and primer are calculated on this figure.
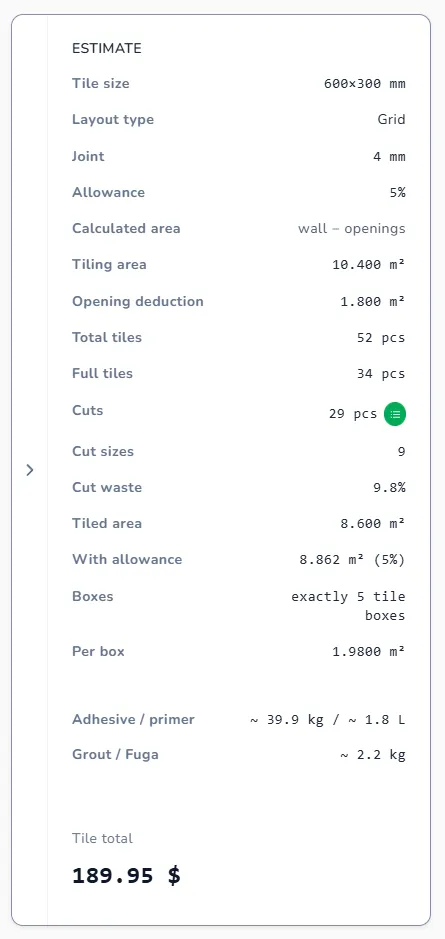
- Total tiles, Full tiles, Cuts: the piece count. The green icon next to Cuts opens the Cut list.
- Cut sizes: how many different cut dimensions the tiler will make
- Cut waste: measured scrap from the cuts on this layout, separate from Allowance
- Boxes: shown as "exactly 5 tile boxes" or as full boxes plus loose tiles. The studio does not round loose tiles up to another box; decide that at the counter.
- Adhesive / primer (about 4.5 kg/m² and 0.2 L/m² of the With allowance area) and Grout / Fuga from the joint length on this layout
- Tile total when a price is set
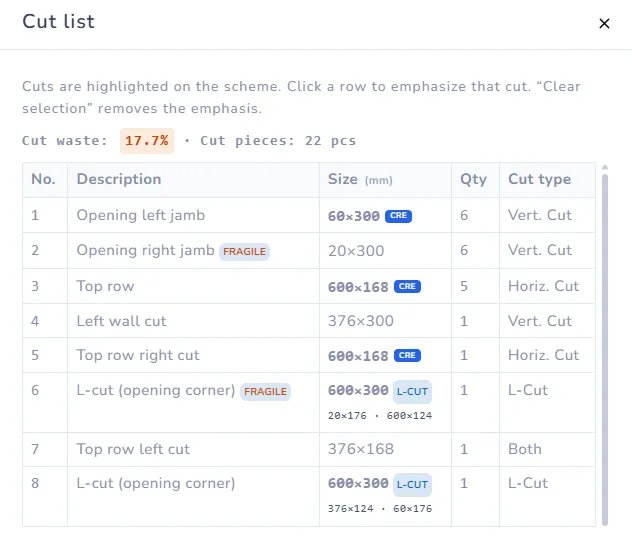
Click Cuts to open the Cut list. The header line reads, for example, "Cut waste: 17.7% · Cut pieces: 22 pcs". Each row is one cut size: description (where it is), size in mm, quantity, cut type. Rows can carry badges: FRAGILE for pieces under your Minimum cut, L-CUT with both arm sizes underneath, and CRE when the piece comes from a shared tile. Click a row to highlight those pieces on the canvas.
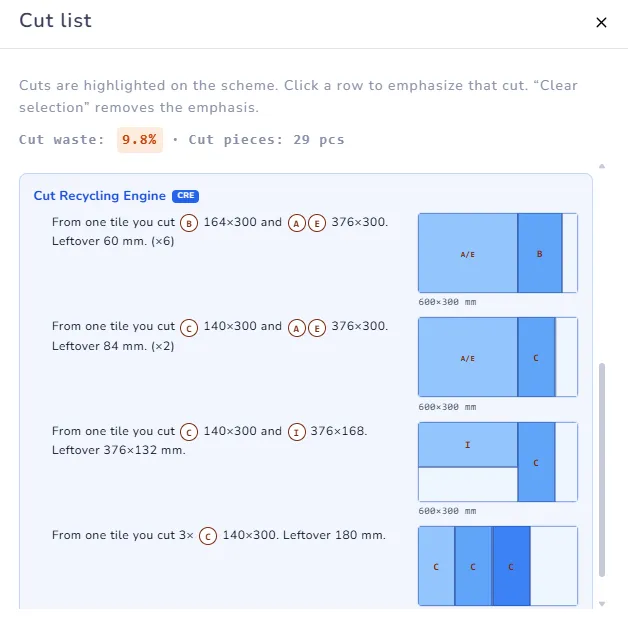
Below the rows, the Cut Recycling Engine section shows how to get several cuts from one tile: "From one tile you cut B 164×300 and A/E 376×300. Leftover 60 mm. (×6)", with a diagram for each recipe. In demo this section is blurred; Free and Professional accounts see it on screen. The recipes are printed in every Blueprint, on any plan.
6. Save
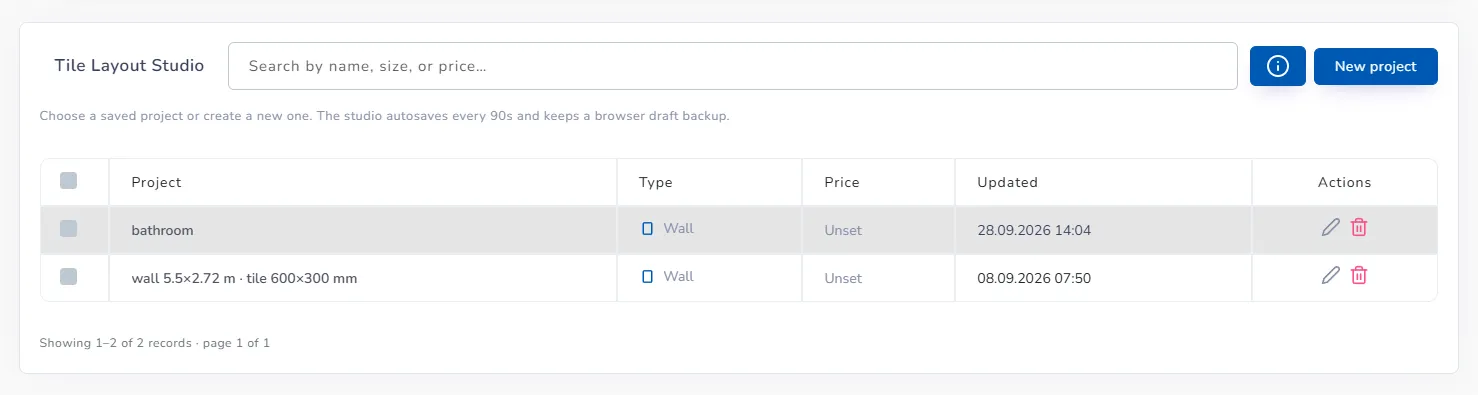
Click the green save icon in the header (Save). You see Saved. While you work, the studio also autosaves every 90 seconds and keeps a draft in the browser. The back arrow next to "Tile Layout Studio" returns to your projects list, where each project shows its type, price and last update, with edit and delete actions.
7. Export a Project Blueprint
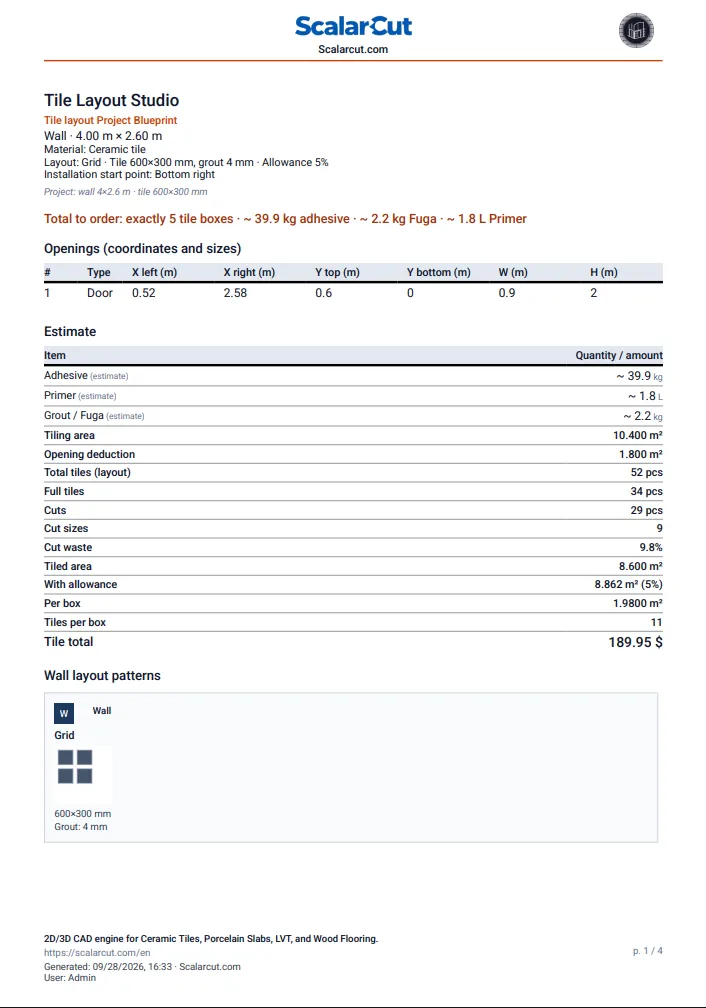
Click the print icon in the header (Download Project Blueprint) or the green Blueprint button under the canvas. The PDF downloads straight away. Page 1 has the wall size, material, pattern, start point, a "Total to order" line, the openings table with coordinates, the Estimate and the pattern thumbnail; later pages carry the layout drawing and the Cut list. Free accounts get 3 Blueprints a month; Professional unlimited. See Project Blueprint.
If something is off
- Quantities are blurred: you are in demo. Click Create account in the orange bar.
- Boxes shows "Unset": enter Tiles per box on the Material tab.
- Grout line is missing: Type is LVT or Wood flooring. Click-lock materials use 0 mm joints and no grout.
- The door will not move where you want: openings cannot overlap and cannot leave the wall.
Next: Add doors, windows and hatches · Choose a pattern · Thin cuts and Sliver Guard
