










A layout is only as good as the size you give it. If the wall is 2.40 m and you type 2.60 m, every row is wrong and the shop order is wrong with it. This is how to enter that size in Tile Layout Studio so the Estimate matches the room.
Wall width and wall height
On the Surface tab, leave Wall selected.
- Wall width — across the face you will tile
- Wall height — from the finish floor to the top of the tile, not to the ceiling if the tile stops short
Each field has a slider on the left and a unit menu on the right: m, cm, mm. Type the number. The slider follows.
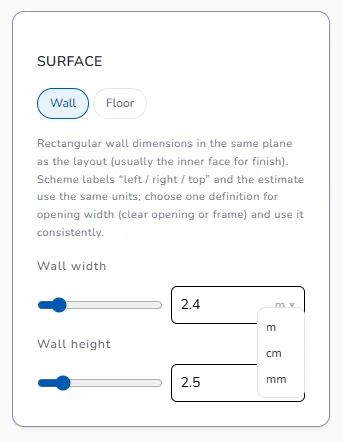
For a wall, the slider runs from 1 m to 12 m wide and from 1.8 m to 6 m high. A bathroom and a living-room wall sit inside that. Switching from Wall to Floor and back pulls a number back inside that range, so a 20 m hall does not belong on the Wall tab — split it, or lay it as a floor.
Measure the face that actually receives tile. If the wall is out of square, use the larger measurement and tell the tiler which end is short. The studio draws a rectangle.
Floor plan type
Choose Floor. The same two fields are now Room length and Room width, and the sliders run from 1 m to 15 m.
Under them, Floor plan type is a paged row of room shapes ("1 / 6"). Pick the shape that matches the room, then fill the lettered fields. The hint on the tab says to walk clockwise; the letter on the plan is the wall you are typing.
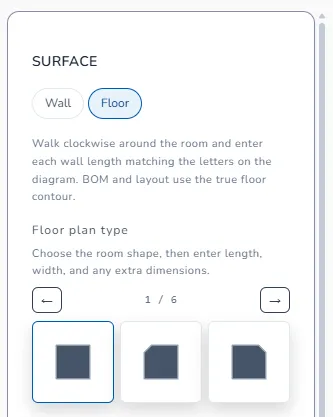
The shapes, in the names the studio shows:
- Rectangle
- A corner taken off: Cut top-left corner, Cut top-right corner, Cut bottom-left corner, Cut bottom-right corner
- A bite out of one side: Cutout top center, Cutout right, Cutout bottom center, Cutout left
- A piece sticking out: Protrusion top, Protrusion right, Protrusion bottom
- Step bottom-left
- L-corner and L-corner (mirror)
- G-shape (vertical) and G-shape (mirror)
- Cuts and diagonal
Additional dimensions appear when the shape needs more than length and width. Those letters are real walls too. A missing letter is a missing wall in the order.
Metres, centimetres, or millimetres
Stay in one unit for the whole job. 240 cm and 2.40 m are the same wall; mixing them is how a door ends up in the wrong place. The canvas labels (left, right, top) use the unit you picked.
Check the area
The canvas shows the wall or the floor at that size, with a size chip such as "20.0 m² · 5.00 m × 4.00 m · Rectangle" on a floor. The Estimate Tiling area follows. If that area is not the room you measured, fix the fields before you look at boxes.